
Embroider a Family Challah Cover
Please note: Step 1 of the printed instructions contains a typo. To begin, you will need to measure 24 inches of thread (not 16”).

On Shabbat, we place a cover over the challah bread until the blessing is said. Since this happens after the blessings for the candles and wine, some say we keep the challah covered so that it doesn’t feel left out.
Our challah cover has been designed to be added to. Each week, use the pattern to stitch a new Star of David. As the year goes on, you will create a one-of-a-kind design for your family’s Shabbat table.
Ready for a more advanced stitch?
You can follow along with the instructions here.
Looking for inspiration?
Check out these clues hidden in the pattern.

Try connecting triangles with cool colors: blue, green, and purple.

Try connecting triangles with warm colors: orange, yellow, and pink.
Star of david stich
Follow these steps to add a Star of David to your challah cover every week.
This stitch is for beginners. If you’re ready, you can try a more advanced stitch here.

1 Measure 24” of thread. To assist, you can measure the 8-inch length from the diagram three times. Thread the needle and tie a knot at the other end, leaving a 2” tail.

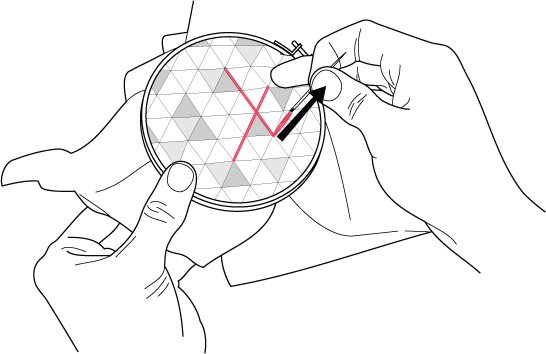
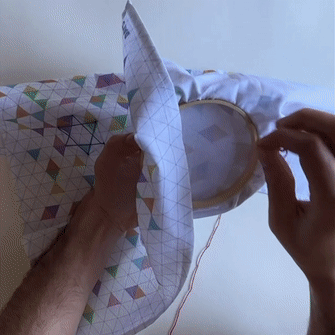
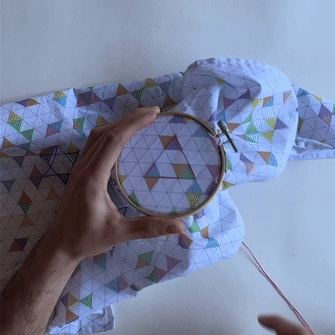
2 Find a Star of David in the pattern and tighten the embroidery hoop around your working area.

3 From behind, pull the needle through the first corner of the Star of David.

4 From the front, stitch across as shown. Then, pull the needle through to the back until the thread lies flat.

5 From behind, thread the needle through the corner as shown above. Then, pull the needle through to the front.

6 From the front, stitch across as shown. Then, pull the needle through to the back until the thread lies flat.
7 From behind, thread the needle through the corner as shown above. Then, pull the needle through to the front.

8 From the front, stitch across as shown. Then, pull the needle through to the back until the thread lies flat.

9 From behind, thread the needle through the corner as shown above. Then, pull the needle through to the front.

10 From the front, stitch across as shown. Then, pull the needle through to the back until the thread lies flat.

11 From behind, thread the needle through the corner as shown above. Then, pull the needle through to the front.

12 From the front, stitch across as shown. Then, pull the needle through to the back until the thread lies flat.

13 From behind, thread the needle through the corner as shown above. Then, pull the needle through to the front.

14 From the front, stitch across as shown. Then, pull the needle through to the back until the thread lies flat.

15 From behind, tie both ends together to secure your stitching. Cut away any extra thread.
Star of david stitch (advanced)
Follow these steps to add a Star of David to your challah cover every week. This stitch is for advanced sewers.

1 Measure 24” of thread. To assist, you can measure the 8-inch length from the diagram three times. Thread the needle and tie a knot at the other end, leaving a 2” tail.

2 Find a Star of David in the pattern and tighten the embroidery hoop around your working area.
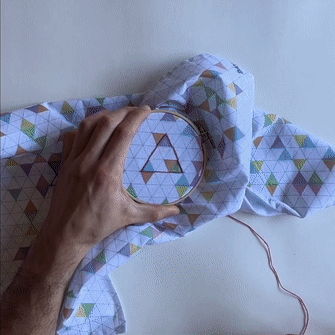
3 From behind, pull the needle through the first corner of the large triangle (3 units long). Continue stitching as shown with an over/under pattern until you return to the corner you started at.
4 Continue stitching with an over/under pattern to fill in the missing spaces of the large triangle. This will complete one equilateral triangle.
5 From behind, begin the next equilateral triangle as shown by sewing with an over/under pattern along the path.

6 Continue stitching with an over/under pattern to fill in the missing spaces of this large triangle. This will complete the Star of David.

7 From behind, tie both ends together to secure your stitching. Cut away any extra thread.


