
Citrus Tree Planter

On Tu B’Shvat, we plant seeds to bring new trees into our world. Our woven planter kit to start growing your own lemon and lime trees from your very own fruit. This planter was designed with three woven strands to represent the elements needed to nurture growth: sunlight, water, and nutrients. Assemble to pieces to create a cozy new home for your seedlings.
Ready for some planting tips?
You can learn more about planting fresh citrus seeds from this blog post.
Assembly Instructions
Follow the steps below to weave and create your own Citrus Tree Planter! Or, follow along with our video tutorial.
Note: You can arrange the felt strips any color order you would like. Or, follow along with our suggestions below.

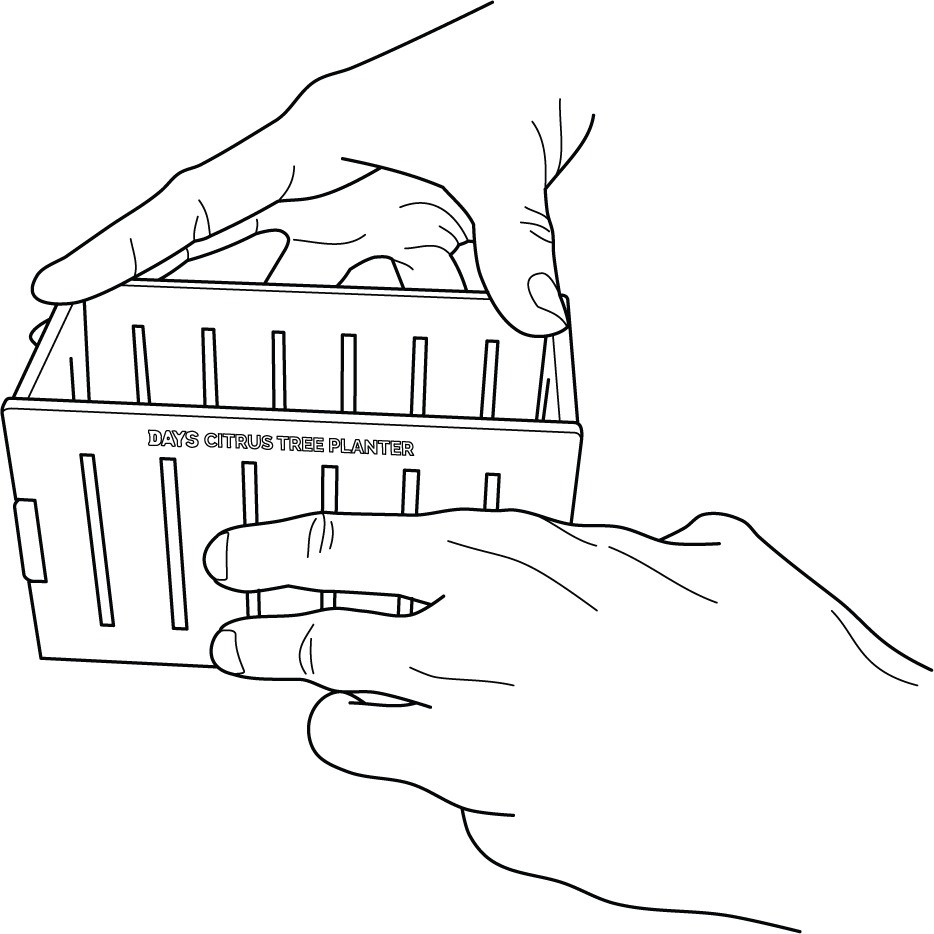
Get Organized: The first step is to gather all of the project pieces.

1 Connect the bottom piece (Part C) with one of the longer sides (Part B) by inserting the notch through the opening in the center.

2 Connect both of the smaller sides (Parts A) by aligning the notches along the base and edges.
3 Connect the fourth side (Part B) by aligning the notches along the base and the edges.

4 With another pair of hands, hold the interlocking parts together by wrapping the rubber band around them.

5 Using the green felt strip, thread it through the second slot in Part B. Orient the strip so that the velcro square is facing inside the planter. (After weaving, you will use this square to attach to the other end of the strip.)

6 Thread the felt strip through the slots in an over/under pattern to create a woven stitch. Keep the felt taut while weaving.

7 At the corner, continue weaving by wrapping the felt strip around the outside edge of the wooden pieces.

8 Continue weaving until you return to the starting point. Press the felt strip against the Velcro square from Step 5 to secure in place.

9.a Thread the blue strip of felt through the third slot of Part B to offset the weaving pattern. Orient the strip so that the velcro square is facing inside the planter. (After weaving, you will use this square to attach to the other end of the strip.)

9.b Continue weaving with an over/under pattern. At the corner, pass the felt strip along the inside of the wooden pieces as shown.

10 Carefully remove the rubber band before placing the yellow strip of felt. Repeat Steps 5-8, following the same pattern as the first row of felt.

11 Guide and pull felt strips to remove any remaining slack. Press each velcro connection to secure firmly. Then, cut away any excess felt if necessary.

12 Now you’ve built a cozy planter for your new seedlings. Get ready to start planting!
Prepare the soil and your seeds
Follow along to prepare your planting project. You will need:
Compressed soil disk (included in your box)
Medium bowl
3/4 cup of water
Lemon and lime with seeds

1 Remove the compressed soil disc from the packaging and place in a medium sized bowl.

2 Add 3/4 cup of water to the bowl. Wait 15-20 minutes for the water to become fully absorbed. Mix as necessary.

3 With adult supervision, carefully slice your lemon and lime. Remove 2-3 of the largest seeds from each fruit. Rinse to remove any excess pulp and set aside.
Note: While it is not required, you may want germinate your seeds before planting for a higher success rate. Check out this blog post for instructions and tips.
Plant and watch them grow!

1 Fill the biodegradable pots with soil.
2 Use your finger to make a small hole around 1/2” deep.
3 Place 2-3 seeds in each hole. Then cover and water lightly.
4 Place in a warm spot near a window. The ideal temperature is between 68°F-82°F.
5 Keep soil moist but not soggy. Do not overwater. With proper conditions, spreads should emerge in about 2-3 weeks!


